Platform Account Configuration
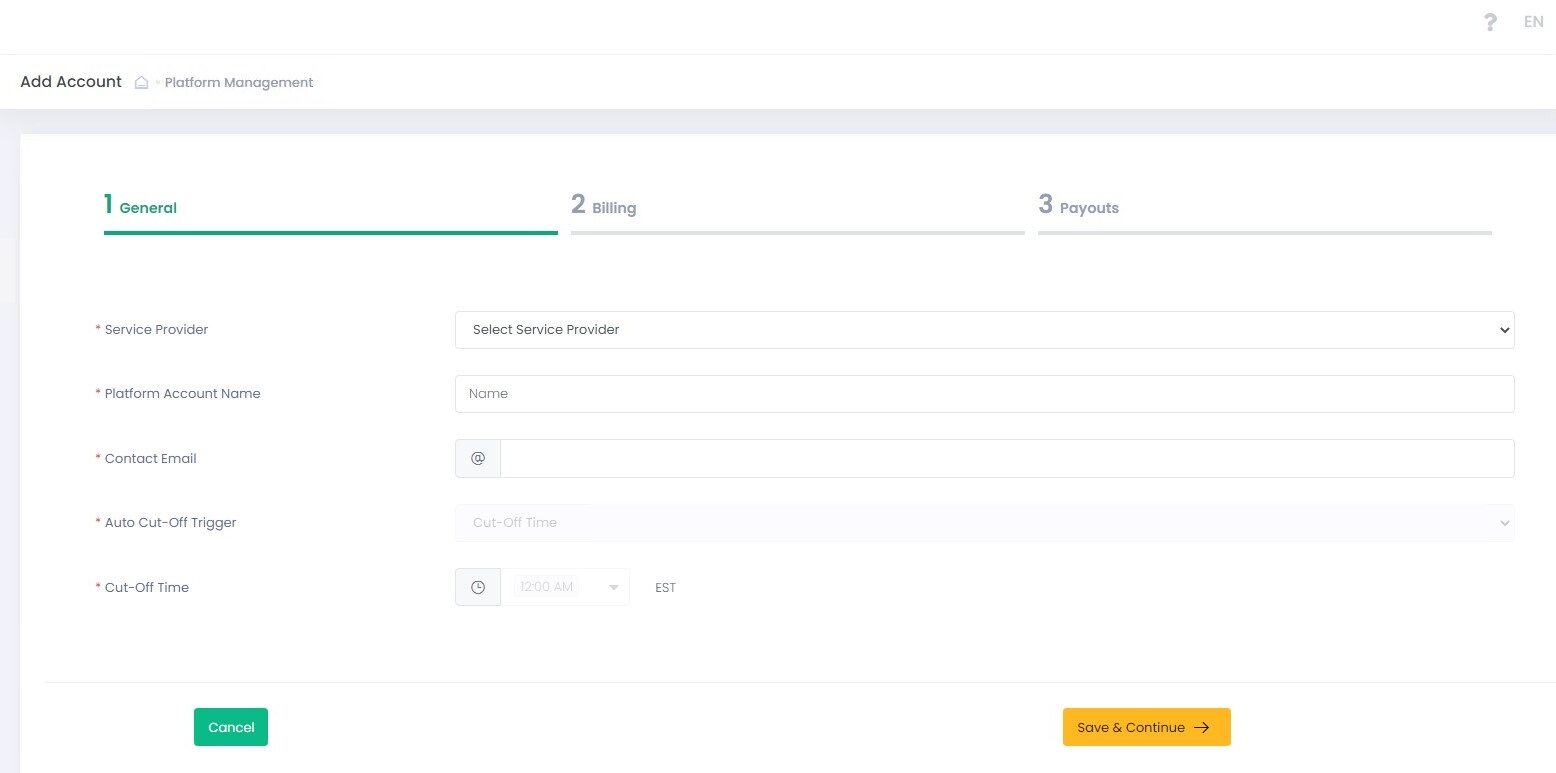
Please connect your Platform Account to a particular Service Provider and specify basic details.
| Name | Description | Optionality |
| Service Provider | Your Platform Account will be subordinate to this Service Provider | Required |
| Platform Account Name | Enter your Platform Account name to be displayed in the system | Required |
| Contact Email | Enter your Platform Account contact Email address | Required |
| Auto Cut-Off Trigger | Service auto cut-off trigger options. Currently it is possible to trigger on cut-off time with available time steps of 1 hour | Cut-Off Time Default Value |
| Cut-Off Time | Set cut-off time. If no cut-off time is set Platform Account will inherit the cut-off time settings of its parent Service Provider | Optional |
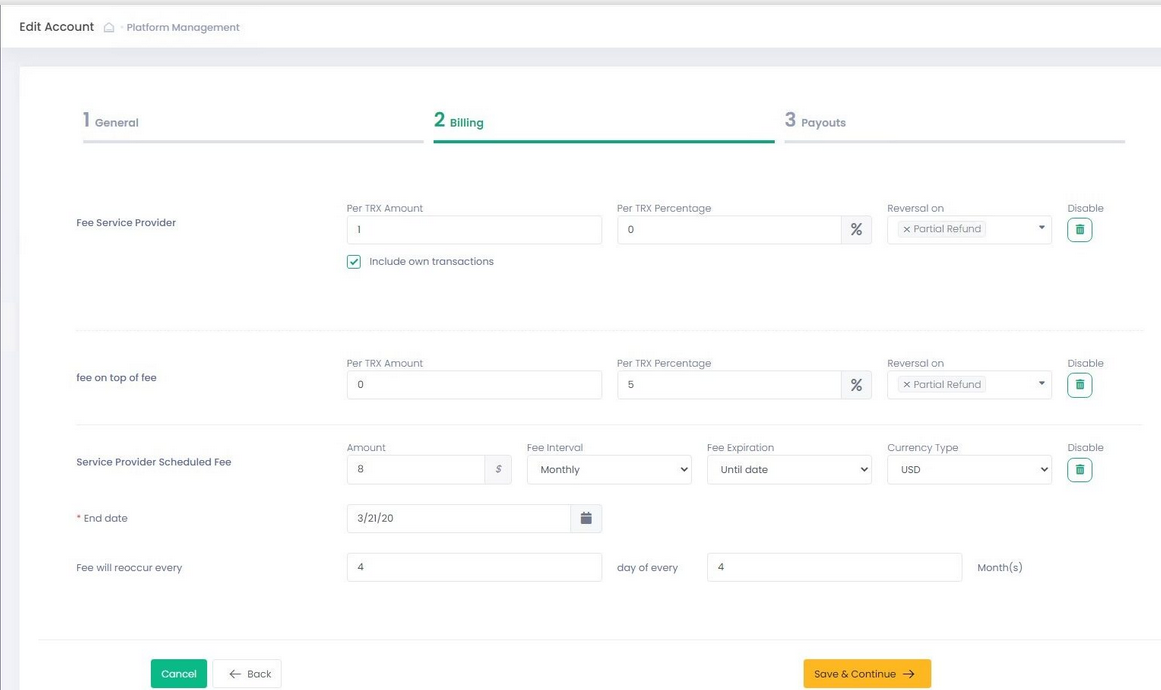
Configure specific values for the Platform Account fees.
Please remember that only the Fees created at the Service Provider level with Fee Source=Platform Account appear at the Billing step of the Platform Account onboarding wizard. Such fees have Operator and Service Provider as fee target available options.
In case no such fees have been created at the Service Provider level, you will see a corresponding warning message.

Use ‘Include Own Transactions’ flag to configure fees triggering transactions:
- If Include Own Transactions = True, the entity’s own and subordinate entity’s transactions trigger fees
- If Include Own Transactions = False, transactions processed by subordinate entities trigger fees
Scale Range, Fee On Top Of Fee, and Scheduled fees are always configured with Include Own Transactions = True. Per-Transaction fees can be configured with both Include Own Transactions = True or False.
See the Billing step of the Sub-Account onboarding wizard for details on configuring different types of fees and their parameters. The Billing step of the Platform Account onboarding wizard follows the Sub-Account onboarding wizard logic for the exception that it creates fees for Platform Accounts and priority levels are not available for these fees.
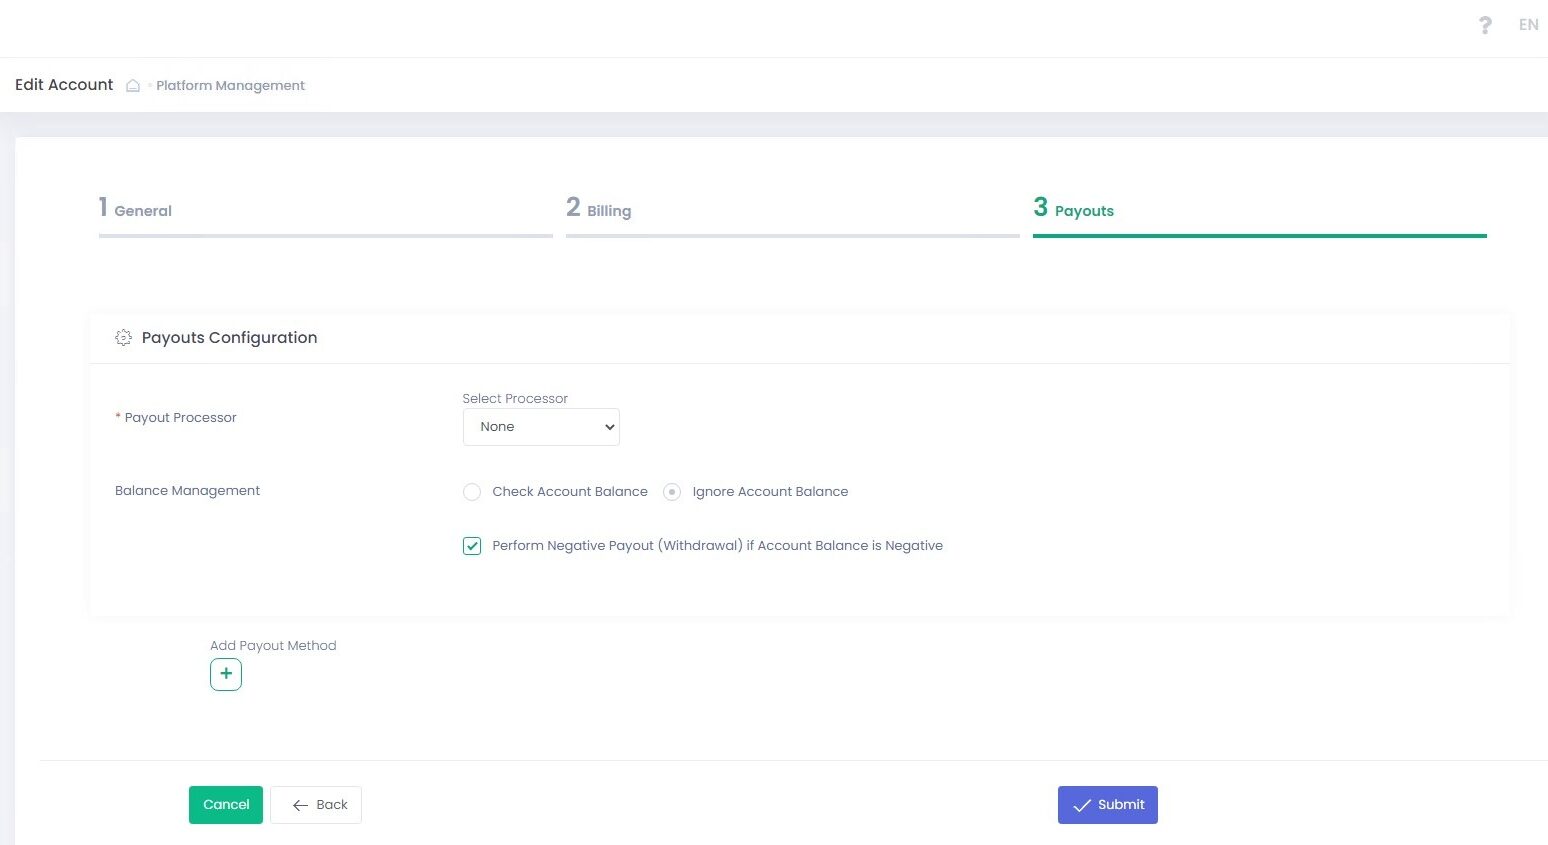
Configure payouts instructions for your Platform Account.
Payouts instructions are split into two sections
- Payouts Configuration
- Payouts: consisting of Payout Bank Details and Payout Schedule
Payouts Configuration Details
| Name | Description |
| Payout Processor | Select a payout processor from the drop-down list or select None to enable manual payouts. Available options are based on the selected Service Provider. External payouts processor is disabled if the manual payouts (None) option is selected. Manual payouts are manually approved in the Back-Office payouts report |
| Processor Parameters | Parameters are pre-populated individually for each payout processor |
| Balance Management | Balance Management allows configuring payouts actions based on the balance value |
| Check Account Balance | Select to enable account balance check prior to the payout. In case enabled, negative payouts are disabled |
| Ignore Account Balance | Select to ignore account balance value for processing payouts. Required to enable negative payouts |
| Perform Negative Payout (Withdrawal) if Account Balance is Negative | In case selected together with Ignore Account Balance and the returned account balance calculated amount is negative – negative payout transaction is processed |
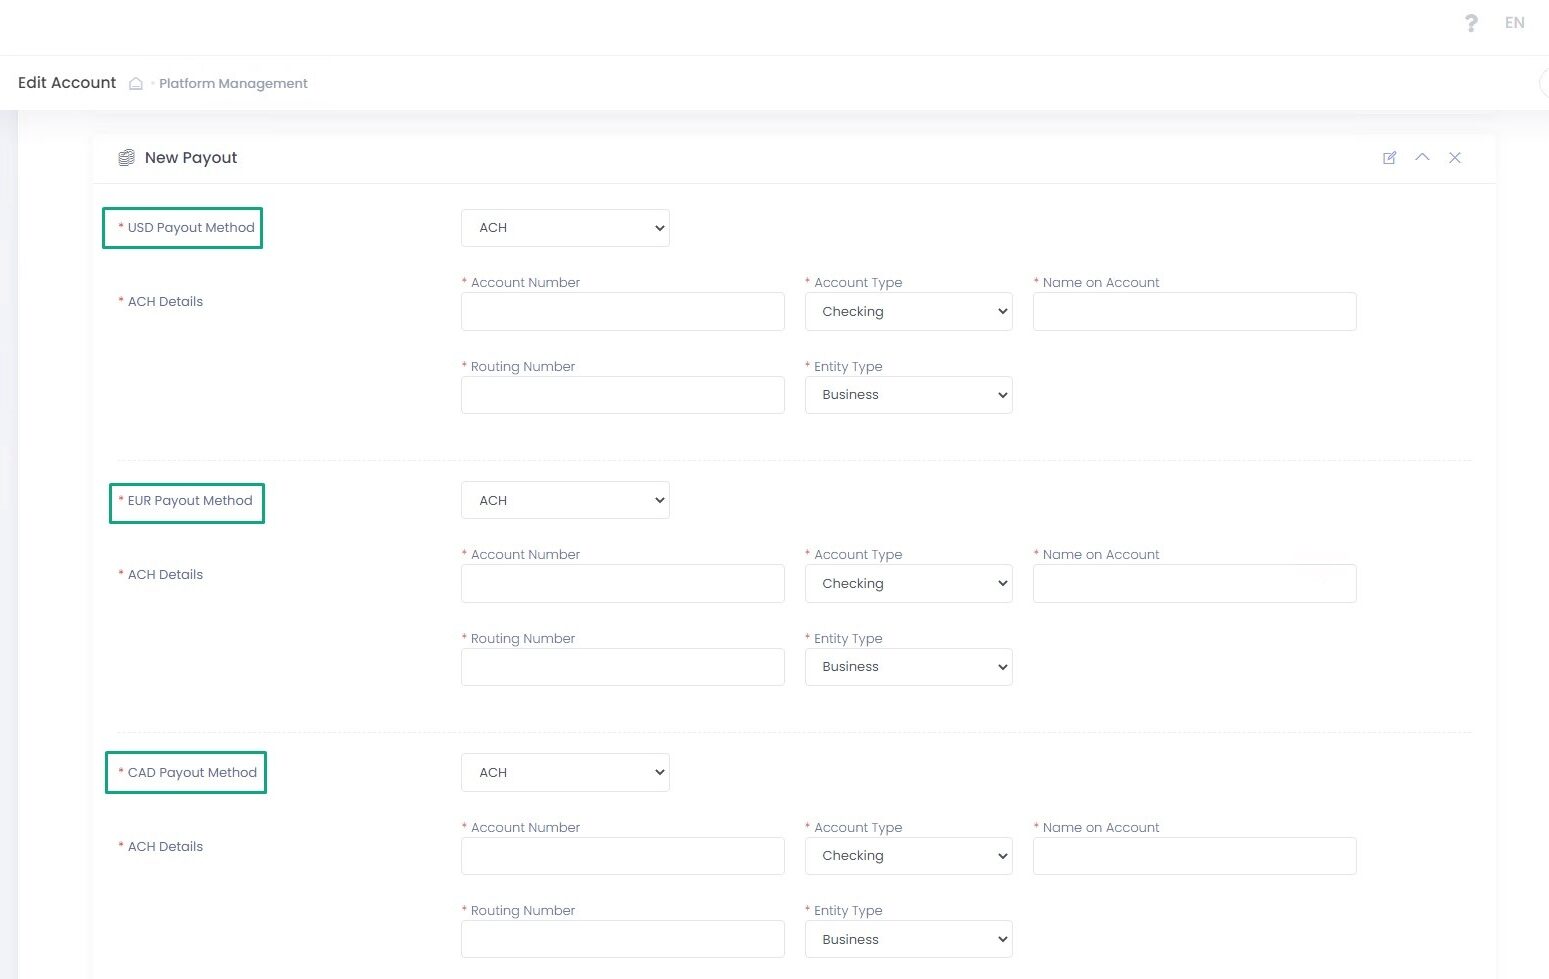
CONFIGURING PAYOUT BANK DETAILS AND PAYOUT SCHEDULE
| Add Payout: use to add an additional payout |
| Edit Payout Method Name: use to edit an existing payout name |
| Hide/Show: use to hide/show a payout configuration |
| Remove: use to delete a payout configuration |
Payout Bank details
The System allows creating an almost endless variety of payout cases based on your business logic. It is possible to create one payout configuration per currency type.
Payout Schedule
In this section you can create payout instructions. You can preset payout amount calculation mode and time range to create a rolling reserve according to your risk management policy.
| Name | Description |
| Payout Method | Select a Payout Method for the payout from the drop-down list. Select None to skip creating a payout instruction for a specific currency. Select ACH to create payout instructions for a specific currency |
| ACH Details All fields are required. Displayed in case ACH is selected |
|
| Payout Scheduler Automated Payout Interval Options |
|
| Payout Scheduler Automated Payout Expiration Options |
|
| Payout and Reserve Management Payout Amount Calculation Methods |
|
| Two-Step | Select to enable an additional manual payout confirmation via the Back-Office |
| approval(semi-automated payout) | Use to add a manual payout approval for automated payouts processed with an external processor or to add an additional manual approval for manual payouts |
| Payout Time | Time picker to set the payout timing |
CONFIGURING TWO-STEP APPROVAL
Enable Two-Step approval to have an option to manually approve or decline suspicious payout transactions.
| Scheduler state | Select to enable/disable payout scheduler |