System Setup Flow
Follow the suggested setup flow to configure the System:
- Collection of Business Data — collect all the necessary Service Provider business data
- With the data from step 1 create and configure at least one Service Provider
- Create and configure a Service Provider Admin
- Create and configure a Template Platform Account
- Create and configure a Template Sub-Account
- Start creating your merchant/seller Sub-Accounts using the Template Sub-Account(s)
Service Provider Branding
The System Branding features provide a complete set of options to customize User Interface. Default Branding settings are applied and only overwritten when the users create their own custom branding changes. The following User Interface elements can be customized:
- Standard User Interface elements such as controls (buttons, checkboxes, etc.), icons, links, notifications, etc.
- Menus (fonts, colors, links)
- Tables (fonts, colors, controls)
- Pop-ups (fonts, colors, controls)
- Wizards (fonts, colors, controls)
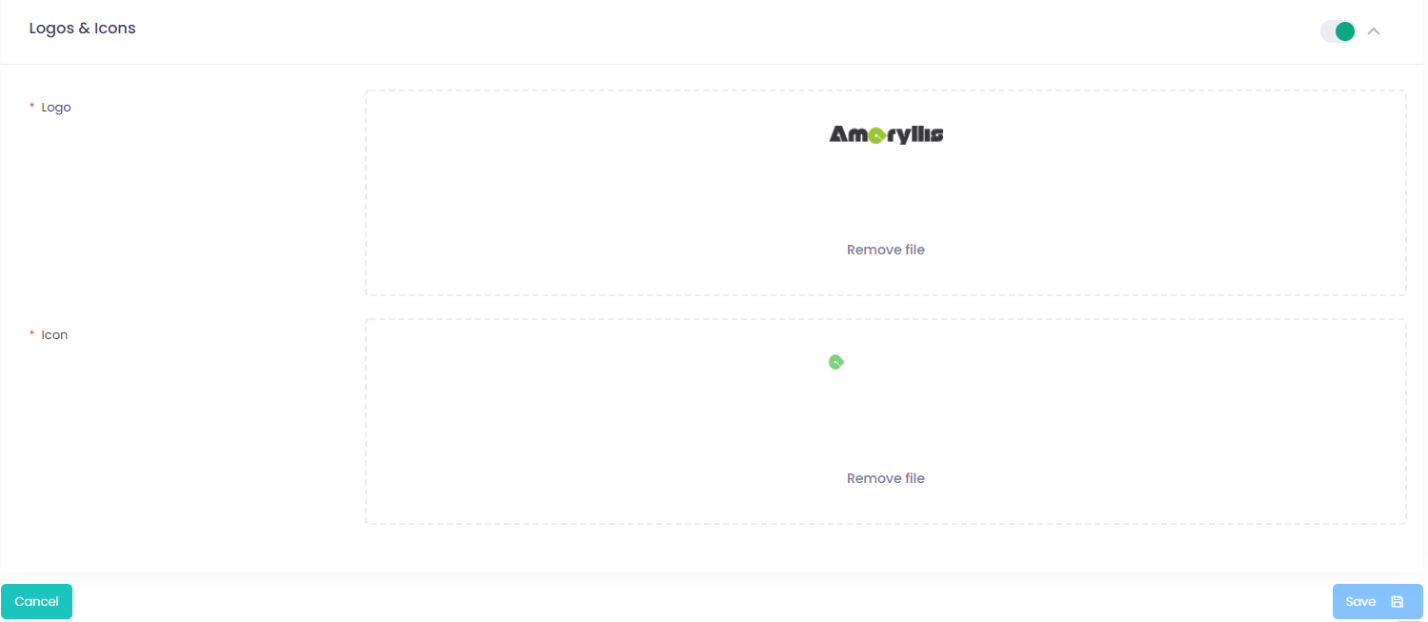
- Additional Branding elements (logos, icons, etc.)
Default Branding settings have been propagated under the Operator and Service Provider levels. Operator and Service Provider Branding is available to the Users with specific permission assigned.
To change branding settings for an Operator or Service Provider:
- Go to the Operator or Service Provider section
- Click ‘Edit Operator/Service Provider Branding’
- Click the toggle of a Branding Settings section to change its settings
- If the toggle is in position Off, it means that the settings are set by default. While clicking this toggle, it moves to position On and the expand arrow is displayed. Click this arrow to open branding settings section, change required settings.
- If the toggle is in position On, it means that the settings are changed and differ from the default ones. While clicking this toggle, it moves to position Off, the expand arrow is hidden, and the settings are reset to defaults.
- Press the Cancel button to close the Branding Settings window without any changes.
- Press the Undo button to reset all branding settings to default ones.
Default settings of an Operator are inherited from the System Management level. Default settings of a Service Provider are inherited from the Operator to which it is subordinate
- Press the Preview button to view branding setting changes before saving them.
- Press the Save button to save all settings changes.
You can override default system settings as well as reset customization to the default state. 
Branding Options available
Branding provides the ability to change the appearance for every specific element in the system including colors of specific elements as well as font styles.

Controls set includes
- Color Pickers

- Font Type Selectors (Type, Color, Background Color, Size, Style)

- Logo and icon upload
Service Provider Grid Layout customization
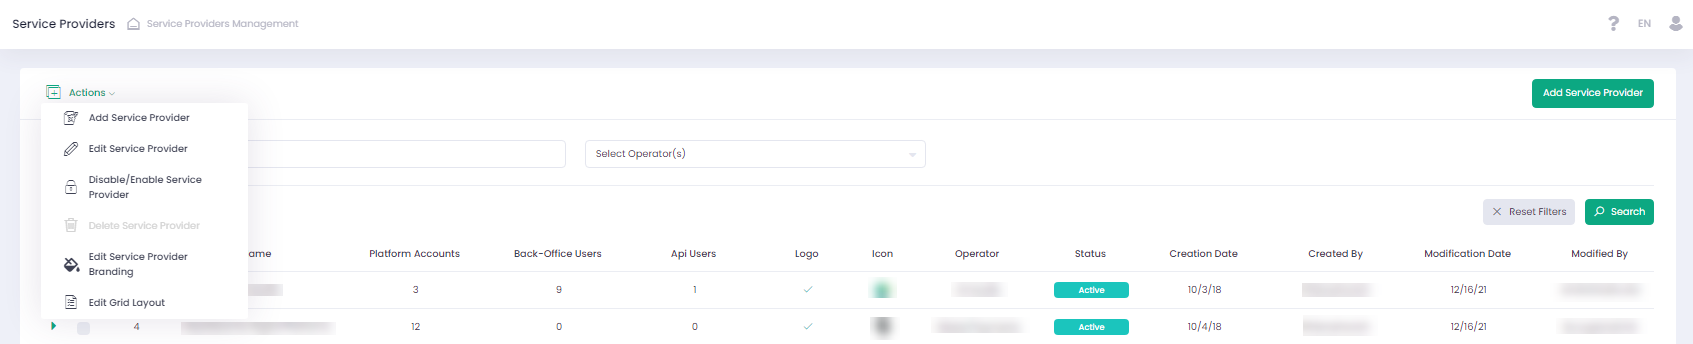
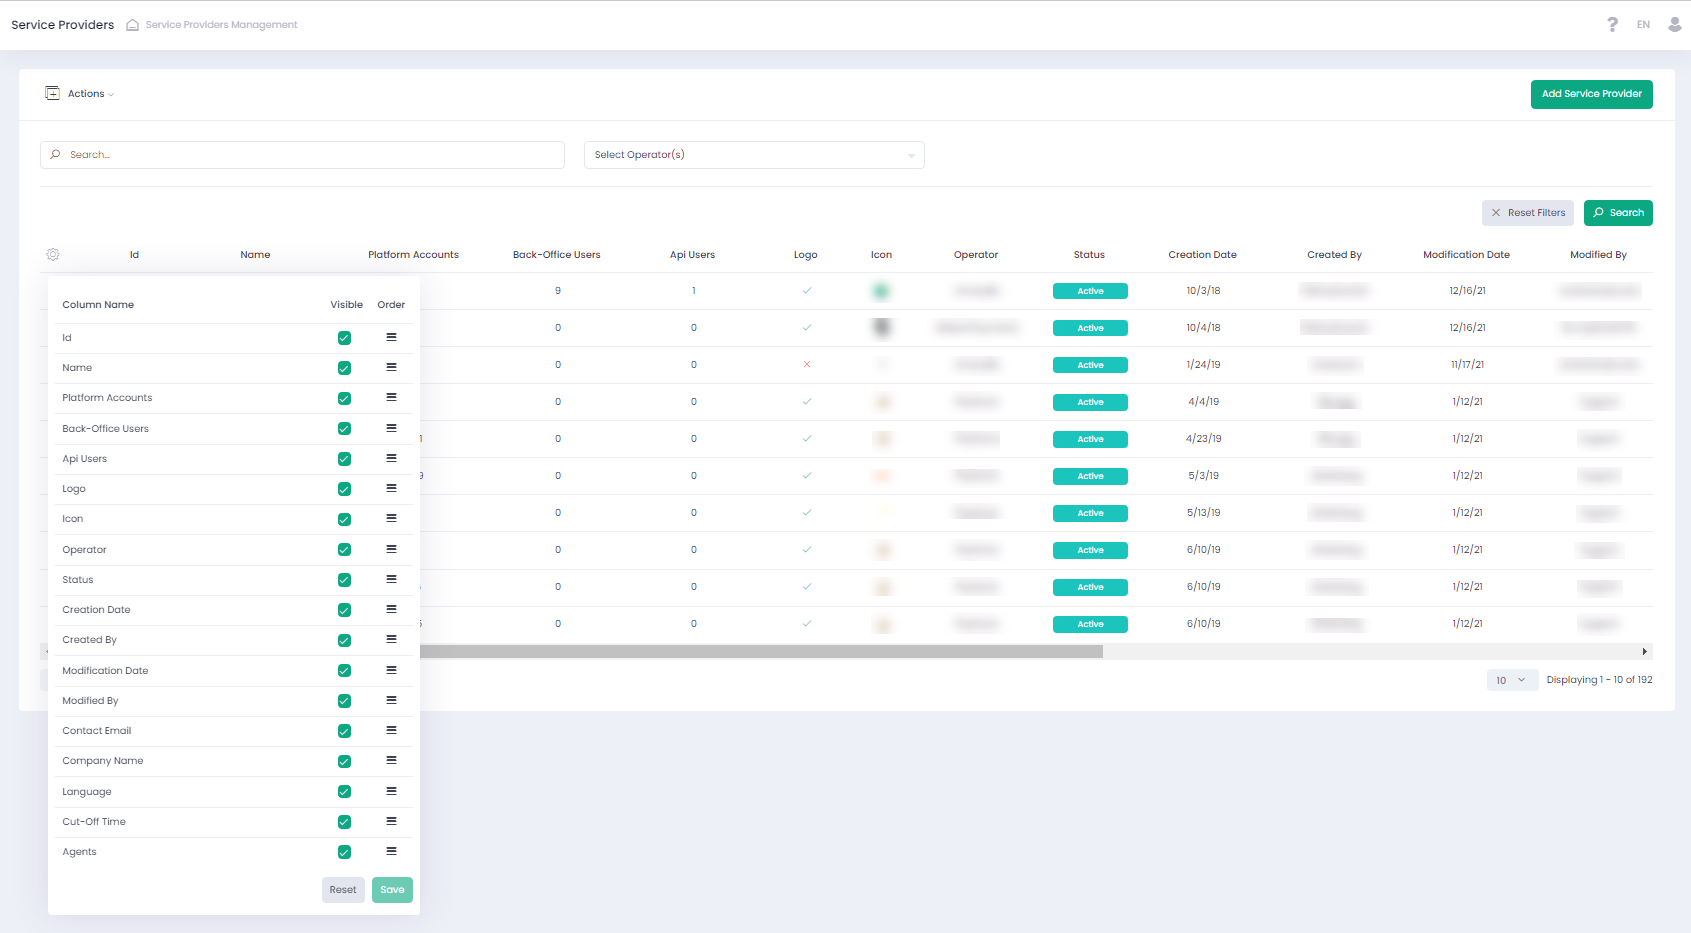
Grid Layout customization allows configuring visibility and order of the columns in the reports grid. The list of available reports and its columns is provided on Service Provider Grid Layout page. It is available via “Edit Grid Layout” from the Service Provider Actions list.
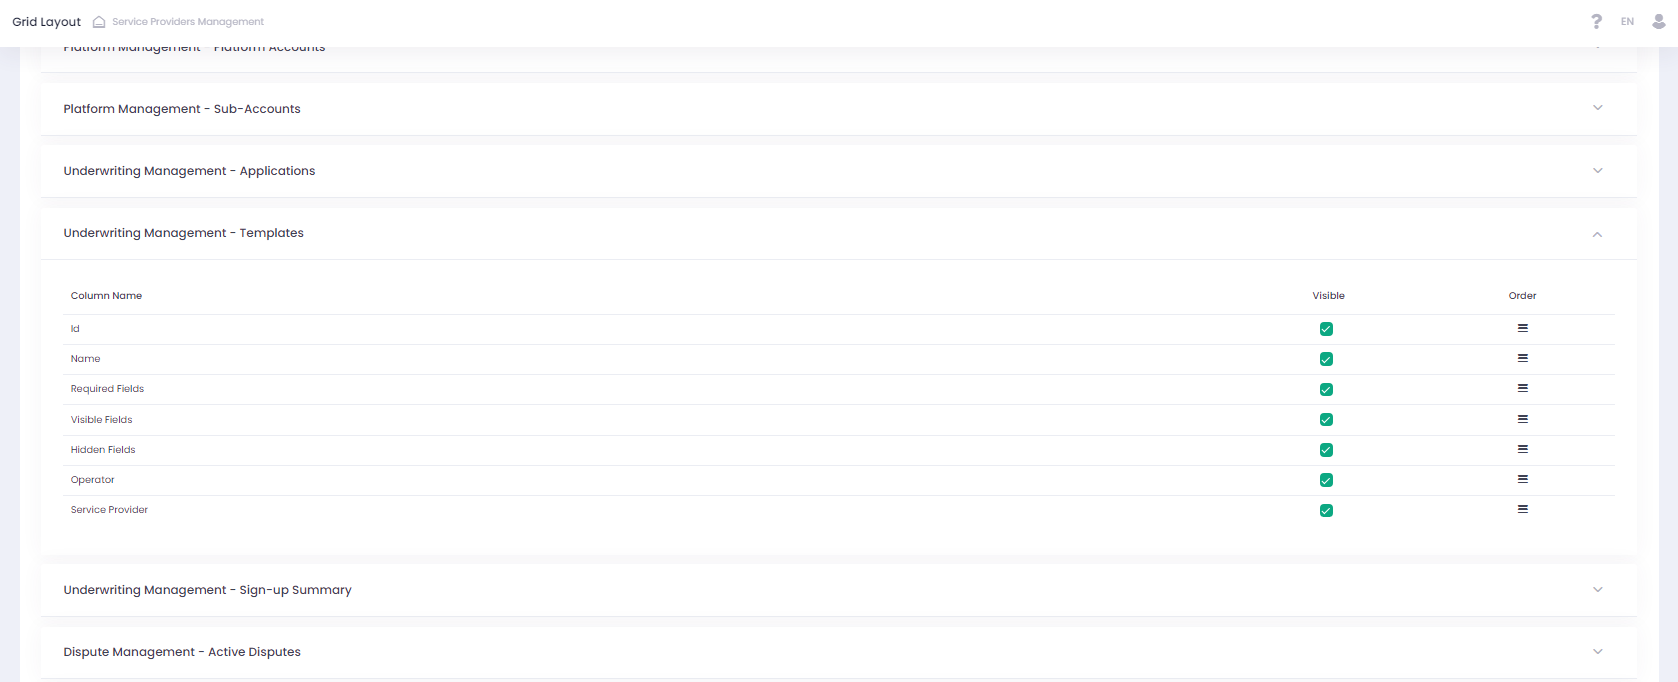
Default Grid Layout settings have been propagated under the Operator and Service Provider levels. Service Provider Grid Layout is available based on User permissions.
On each Back-Office page that is available for the User it is possible to view the existing configuration and to set up a custom view. When users create their own custom Grid layout changes, default grid layout settings are overwritten.
The Service Provider Onboarding Wizard
Service Provider Onboarding Wizard is a seven-step procedure that allows to Create and/or Edit Service Providers Entities. The procedure consists of the following steps:
- General Information
- Processing Information
- Interchange Fees
- Fees and Residuals
- Payout Banks
- Billing
- Payouts Configurations
Available Actions Save and Continue — save settings and proceed to the next step

Back — return to the previous step without saving

Cancel — abort onboarding without saving

Submit — save and complete the onboarding procedure ![]()
Information Requirements
Before setting up your Service Provider you should have the following information of the Service Provider available:
- Service Provider Color scheme, Icon, and Logo
- Processors to be used
- Credit Card Types
- Applicable Interchange Fees
- Fee Structure and Fee Names and — Amounts
- Payout Bank Details (for Payouts to the other entities)
- Service Provider Payout Bank (for receiving payouts)
Add/Edit a Service Provider
Configuring General Information Details
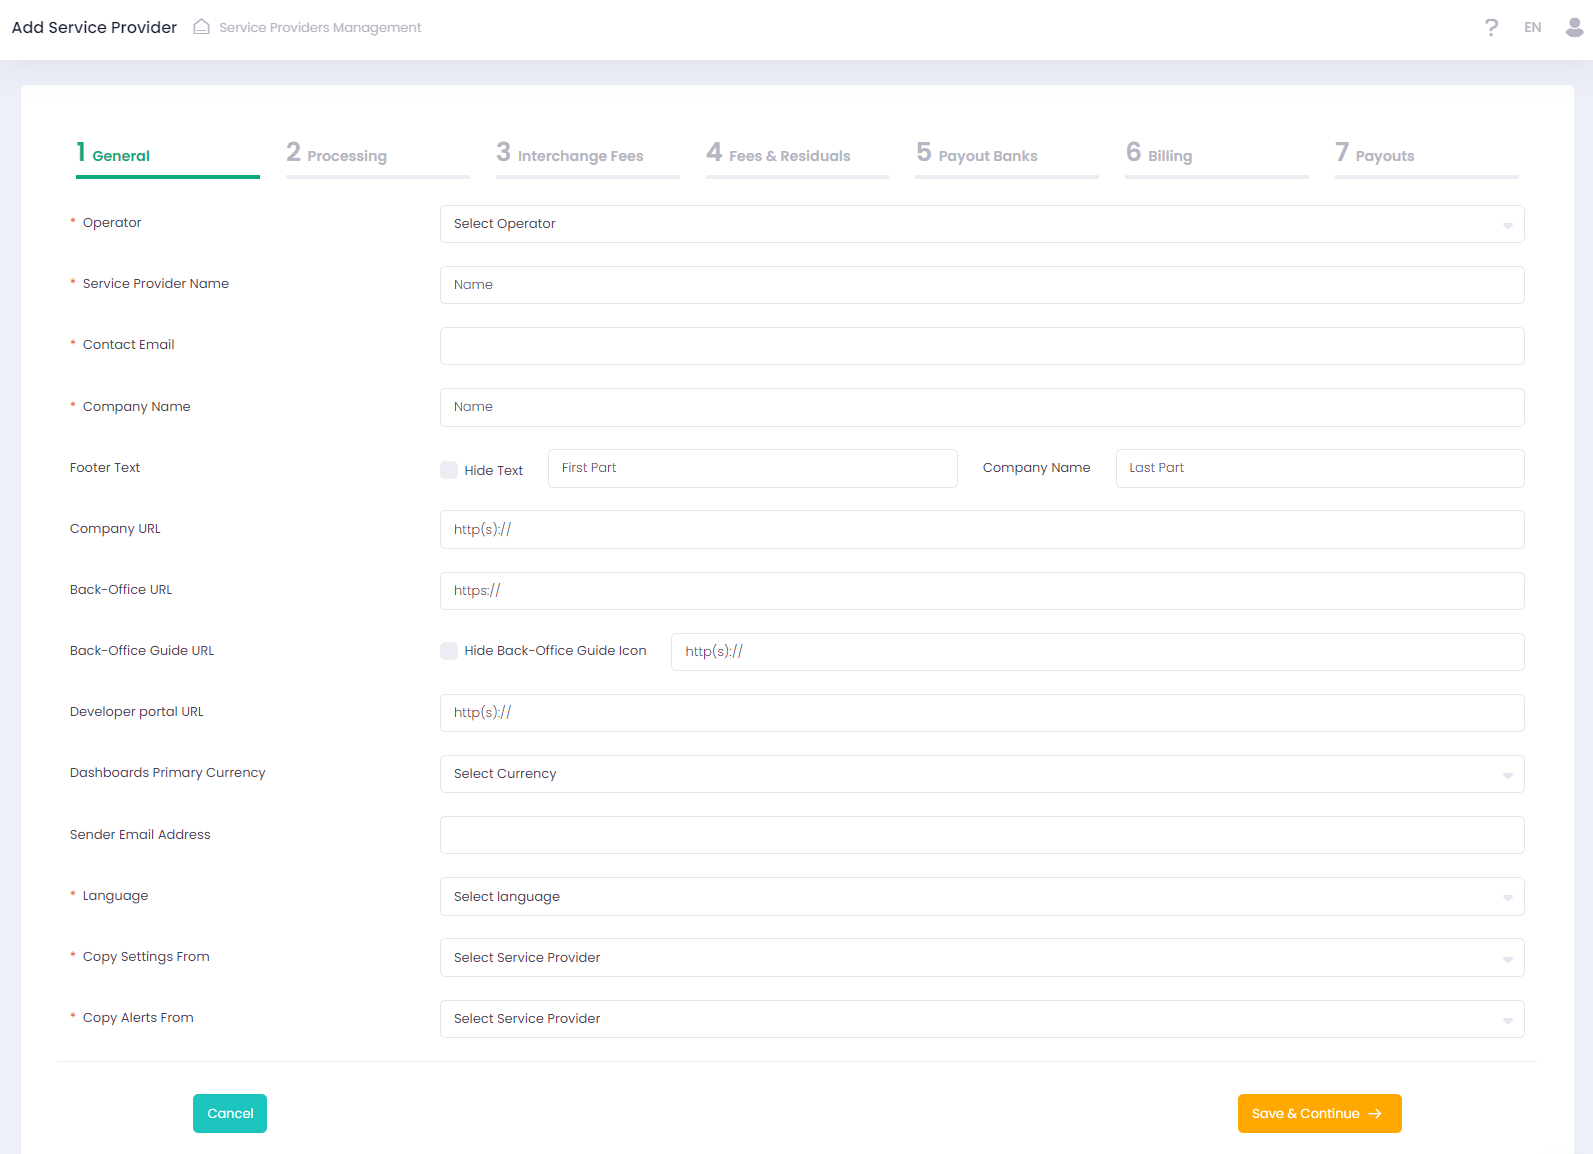
In this step, General, you will provide all the general information that will determine the way your Service Provider Entity will be displayed in the System. Information that you provide in this step will be used to create a white label (custom) interface for your Service Provider Entity (color, logo etc.).
| Name | Description | Optionality |
| Service Provider Name | Service Provider Company Name that will be displayed in the Back-Office | Required |
| Contact Email | Service Provider contact Email address | Required |
| Company Name | Service Provider Company name that will appear in the page footer. | Required |
| Footer Text | Activate Hide Text to hide footer text entirely. Users can edit footer text before and/or after the Company Name. In case omitted, values are inherited from the parent system entity or default settings apply. | Not Required |
| Company URL | Service Provider Company URL, that will appear in the page footer. | Not Required |
| Back-Office URL | Service Provider Back-Office URL. This URL is provided in the registration email with the user credentials, that is send to users upon their registration. In case not populated, the default Back-Office URL applies. | Not Required |
| Back-Office Guide URL | Service Provider Back-Office Guide URL. This URL is provided in the registration email with the user credentials, that is send to users upon their registration. In case specified, the provided values replace: URL that is sent to users by default in the registration email Back-Office help icon hyperlink value In case not populated, the default Back-Office User Guide URL applies. | Not Required |
| Developer Portal URL | Service Provider Developer Portal URL. The Developer Portal URL is located in the User profile section | Not Required |
| Dashboards Primary Currency | The currency that will be set as default for the dashboard currency filter. | Not Required |
| Sender Email Address | Email address that will be used for sending emails. In case not populated, the default Operator Sender Email address applies. | Not Required |
| Language | Select the interface language from the list of available languages | Required |
| Color | Theme color used for Back-Office display | Required |
| Icon | Service Provider Theme FAV Icon used for Back-Office display | Not Required |
| Logo | Service Provider Theme Logo used for Back-Office display | Not Required |
| Copy Settings From | Select a source Service Provider to copy configuration settings to a new target Service Provider. Select None to disable all templates. Enabled for Add Service Provider form only. | Required |
| Copy Alerts From | Select a source Service Provider to copy alerts settings to a new target Service Provider. Select None to disable all templates. Enabled for Add Service Provider form only. | Required |
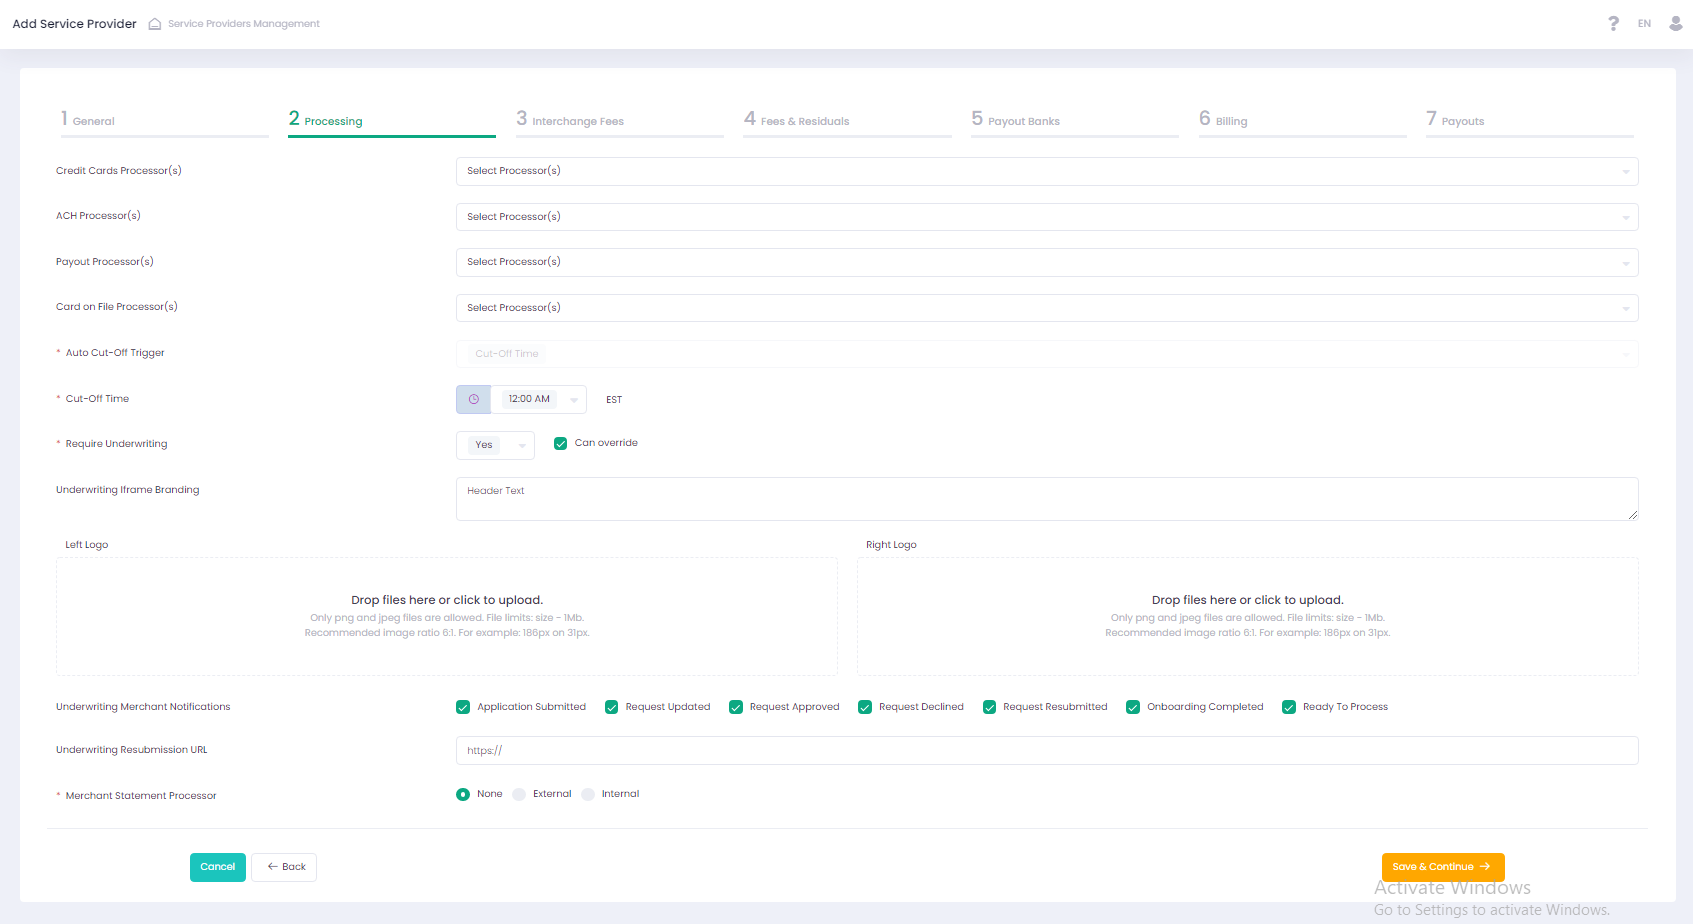
Configuring Processing Details
In this step you set your Service Provider transactions processing configurations and determine
- Credit card processors
- ACH processors
- Card On File processors for negative payouts for Sub-Accounts Payout processors
The selected processors will be in the available options for Platform Accounts and Sub-Account that will be created under this Service Provider. Click each text area to show all the available options. You can select more than one option in each field.
Configuring Credit Card Processing Options
In this section you determine your Supported Credit Card(s). You can select more than one credit card type. The Credit Card Types you select here will be displayed as available Credit Card options for your Sub-Accounts configurations and for your Reports.
Cut-off time administration
Auto Cut-Off Trigger enables to configure the Cut-Off time based on a specific trigger. Currently it is possible to trigger on cut-off time, with available time steps of 1 hour.
CUT-OFF INHERITANCE LOGIC
A Cut-Off time can be set for each entity individually. However, if no cut-off time is set the entity will inherit the cut-off time settings of its parent entity, e.g., a Sub-Account will inherit the settings of a Platform Account. In case parent entity cut-off value is not set, then the cut-off time is set at 12:00 AM
Underwriting Settings
UNDERWRITING CONFIGURATION
In this section you can configure Underwriting settings for subordinate Sub-Accounts:
- Require Underwriting — set yes to enable underwriting when onboarding Sub-Accounts
- Can override —activate to enable Sub-Account overriding underwriting settings
- Underwriting iframe Branding — in this section you can set the following application branding details:
- Header Text
- Left Logo
- Right Logo
UNDERWRITING MERCHANT NOTIFICATION
In this section you can select triggering event for receiving notifications about applications:
- Application Submitted
- Request Updated
- Request Approved
- Request Declined
- Request Resubmitted
- Onboarding Completed
- Ready To Process
Merchant Statement Configuration
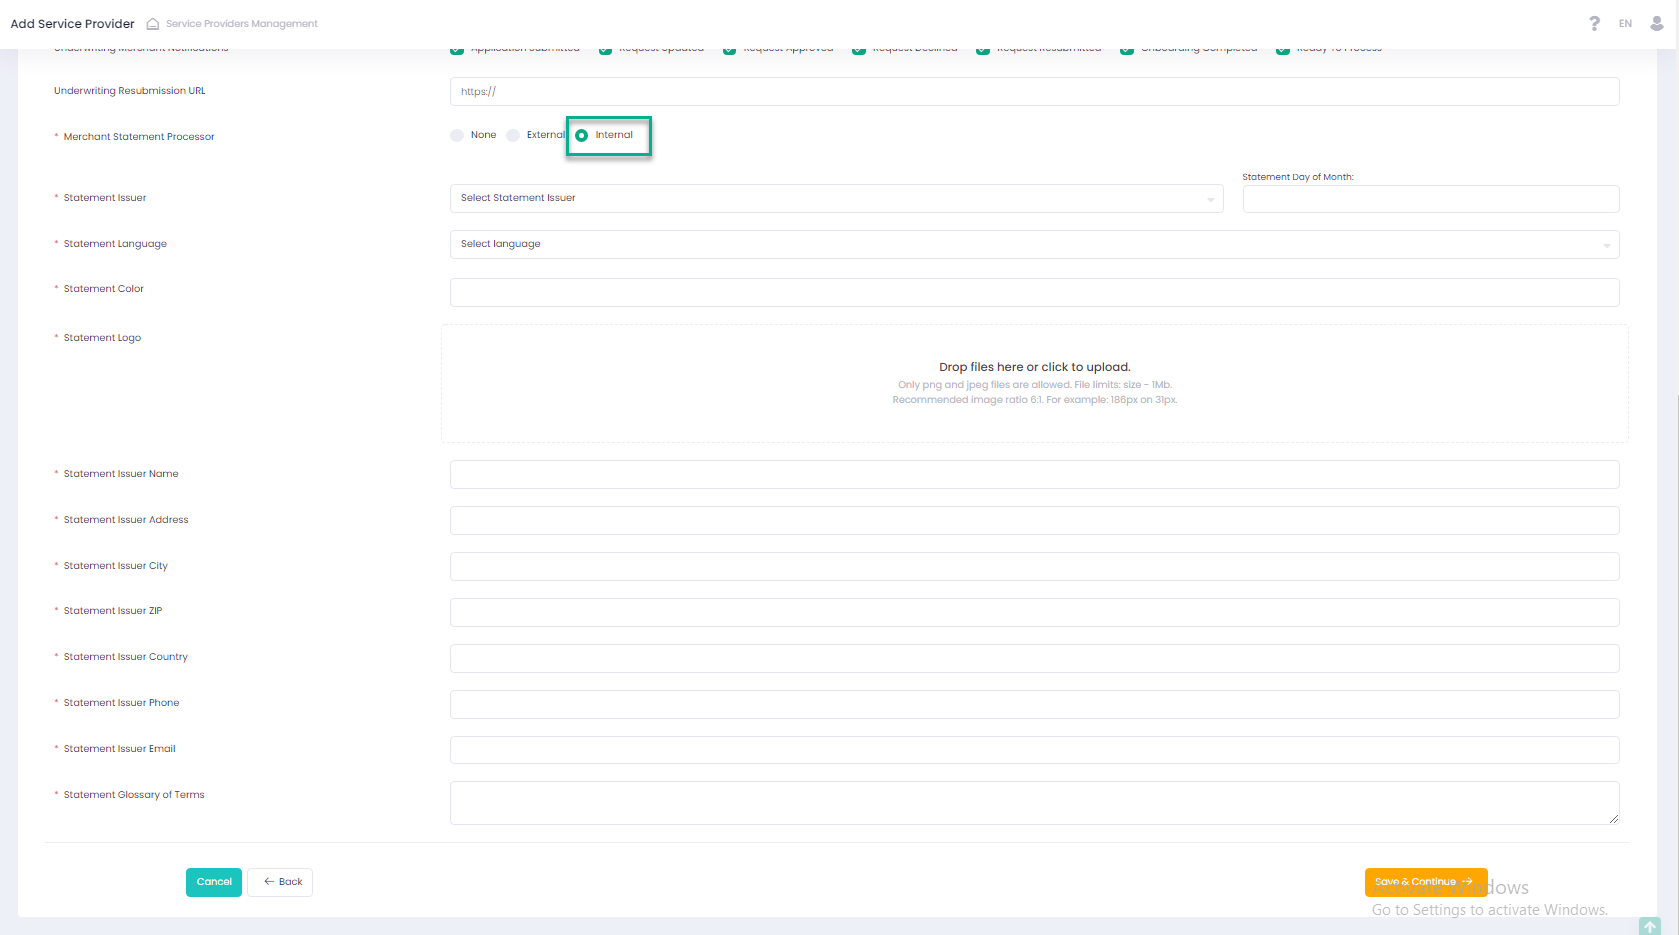
Use Merchant Statement Processor selector to choose your Service Provider merchant statement processor. Available statements are displayed in and can be downloaded from the Merchant Statement Report. Users have access to Merchant Report based on their permissions level. There are three Merchant Statement Processor options:
- None — no additional logic is implemented
- External — user is given an option to select a statement issuer from the list of available processors. In this case the merchant statement report is supplied by the third party
- Internal — user can configure a merchant statement report using a list of provided parameters — see below.
User can select only one of the available options
In case Internal merchant statement issuer has been selected, user can configure the report output details using parameters below:
- Statement Issuer
- Statement Day of Month
- Statement Language
- Statement Color
- Statement Logo
- Statement Issuer Name
- Statement Issuer Address
- Statement Issuer City
- Statement Issuer ZIP
- Statement Issuer County
- Statement Issuer Phone
- Statement Issuer Email
- Statement Glossary Terms
Configured merchant statement report parameters are available for preview in the Service Provider Details/Processing Settings tab.
Interchange Configuration


Interchange Fees is an Optional step. If you want to skip this step, do not activate any Interchange Fees and click Save and Continue to proceed to the next step. All available Interchange Regions are displayed in this section. Expand each region to preview all the configured fees for this region.
Activating Interchange Fee’s
To Activate Interchange Fee:
- use toggle to activate the Interchange Fees Region(s) that you require from the list of available Interchange Fees Regions
- the Interchange Fee will be identified by the System Id (Id).
- If you want to use your own ID you can do so by using the External Id field:
- Use filter to search for the Interchange Fees you want to configure, enter fee name if you know it, and/or choose Debit or Credit fee type
- Enter your own Id in the External Id field for the relevant Interchange Fees.
- If you want to use your own ID you can do so by using the External Id field:
INTERCHANGE FUNCTIONALITY
You can perform the following actions on active interchange regions:
- Select Fee Target from the drop-down to assign the entity that will receive the Interchange Fee.
- Select Billing Date Delay to set a billing date delay for the Interchange Fee.
- Mark the Interchange Fee as External Cost. See ‘Mark as Cost’ in the ‘Fees Configuration Details’ section for more information.
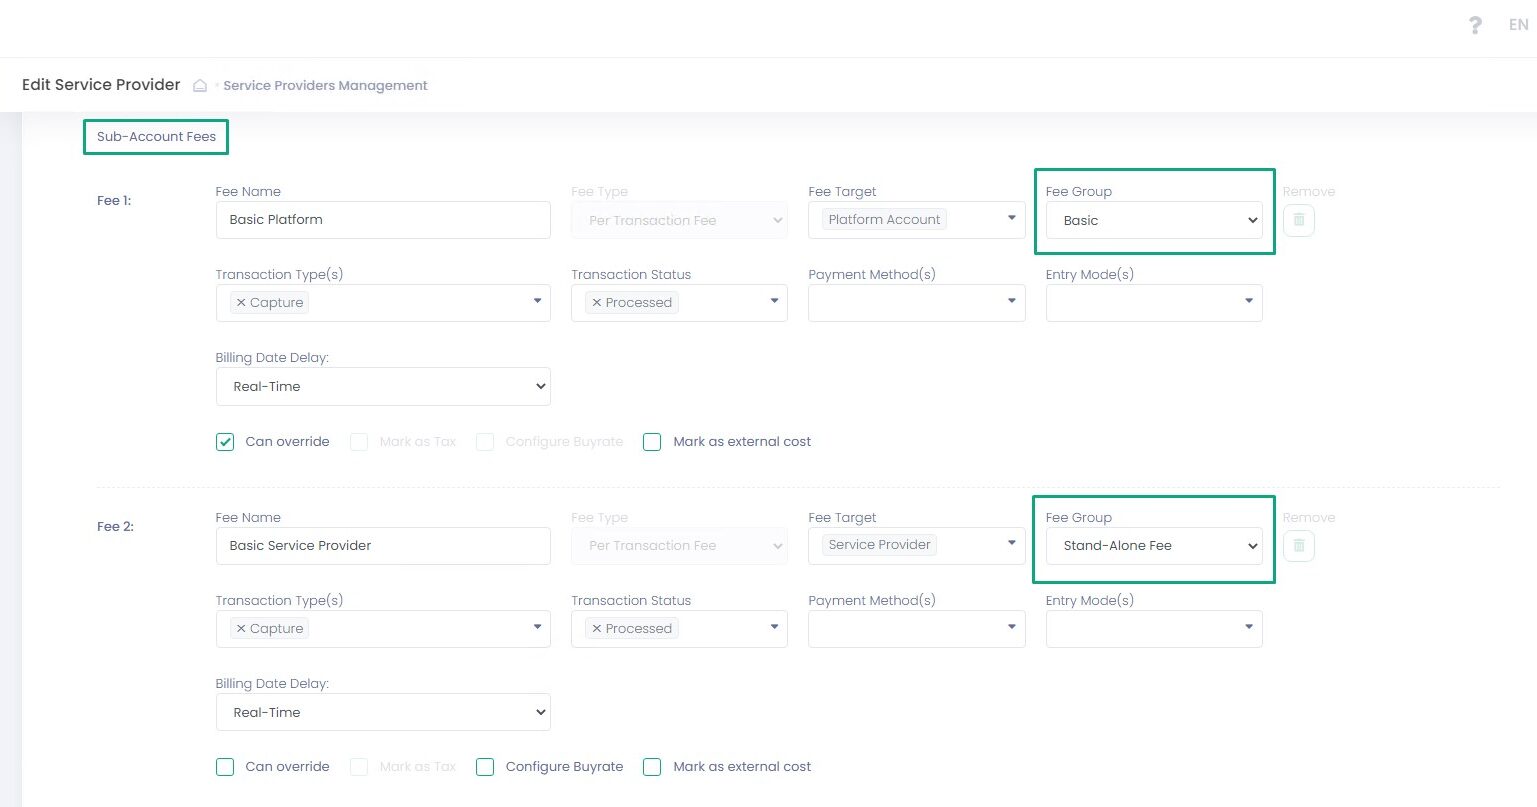
Creating Fee Groups and Fees


In this step Fees and Fee Groups are configured. This step only defines the combination of parameters that should be used for each fee. The actual individual fees values will be configured at the sub-account level individually based on the settings that you create in this step. In this section you can create:
- Fee Groups — to split fees between multiple recipients
- Fees – Stand-alone (individual) fees
Creating or Deleting a Fee Group
- Click Add (+)
- Enter a Fee Group Name. This is the name of the Fee that will be displayed on Sub-Account level.
- Select one of the Fee Types. Please note, once a fee group has been created you cannot change Fee Type parameter for this fee group.
- If applicable, enable Mark as Tax. As a result all Fees in this group will be Marked as Tax
Creating or Editing a Fee

- Select a Fee Source and click Add (+) to add a new fee section
- Navigate to the newly created Fee section.
- Enter a Fee Name. This is the name of the Fee that will be displayed in the Back-Office. In case the fee is part of a Group, on Sub-Account level the Fee Group name will be displayed.
- Select Fee Type from the list. Please note, once a fee has been created you cannot change the Fee Type parameter for this specific fee.
- Select a Fee Target – available options depend on the selected Fee Source
- Select Stand-Alone Fee for a single fee or one of the Fee Groups that you have created in the previous section for a fee belonging to a group fee.
- Select one or more Transaction Type(s) from the list of available transaction types. Not relevant for Scheduled Fee and Fee on Top of Fee.
- Select Transaction Status – create fees for both successful and/or declined transactions. Not relevant for Scheduled Fee and Fee on Top of Fee.
- Select one or more Payment Method(s) from the list of available payments methods, if left empty the fee will apply to all payment methods. Not relevant for Scheduled Fee and Fee on Top of Fee.
- Select Entry Mode from the available list of entry modes, if left empty the fee will apply to all entry methods.Not relevant for Scheduled Fee and Fee on Top of Fee.
- Select Billing Date Delay to delay the execution of the fee to a future date and specify fee delay parameters, otherwise choose Real-Time to execute the Fee in real time.Not relevant for Scheduled Fee
- Enable Can override to allow overriding the fee values on a sub-account level
- Enable Mark as Tax to identify the fee category as Tax. Skip to identify fee category as Fee.
- Click Remove to Discard the Fee
- You cannot remove a fee that has already been used
- Enable Can override to allow overriding the fee values on a sub-account level
- Enable Mark as Tax to identify the fee category as Tax. Skip to identify fee category as Fee.
- Enable Configure Buyrate to configure for a Fee a Buyrate portion for a Buyrate Target.
- Enable Mark as external cost to display in the Profitability Analysis Report of the Fee Target under Transaction Cost Amount and affect the overall Profit Amount.
Reserve Configuration
Reserve Release Date Delay

Reserve Release Date Delay enables you to customize your reserve balance release settings. This option is only enabled in case the Fee Target = Reserve Balance.
Reserve Balance Limit
Reserve Balance Limit enables you to limit the total amount of Reserve Balance you will keep. If Reserve Balance is selected as Fee Target, the Reserve Balance Limit input field will appear so you can specify the limit amount for that fee. In case a limit indeed is set, the system will check the reserve balance before applying the reserve fee. If the reserve balance is greater or equals the preset limit value, the system will not apply the reserve fee. Reserve Balance Limit is specified per reserve fee and per Service Provider and does not depend on currency. The limit value can be different for different reserve fees.
Billing Delay

Billing Date Delay enables you to delay billing of your fee, instead of real-time (immediate) billing. In the Billing Date Delay settings, you can specify the delay time span. Values provided in this step will be available as default billing date delay settings for relevant Sub-Accounts billing settings and will not be displayed in the Sub-Account Billing Onboarding step.
| Name | Description |
| Weeks | Enter Number Of Weeks value to determine a fee weekly billing delay time span and On value to select a billing weekday |
| Months | Enter Number Of Months value to determine a fee monthly billing delay time span and Day Number value to select a billing sequential calendar day |
| Years | Enter On value to determine a fee billing month and Day Number value to select a billing sequential calendar day |
| Real-Time | Select for real-time billing |
Buyrate Configuration
Buyrate enables you to configure for a Fee a Buyrate portion for a Buyrate Target. Note that in case Buyrate is configured the Buyrate portion will apply first before any other fee portion calculations will be made.

Buyrate option can be enabled for Per-Transaction fees, Fee On Top Of Fee fees, Sliding Scale fees. Conditionsfor using Buyrate:
- Fee Source = Sub-Account
- Fee Target options: Sub-Account, Agent, Platform, Service Provider. Operator and Reserve Balance cannot be targets for Buyrate.
In case enabled, users on a Sub-Account level can configure a Buyrate fee value for a Buyrate Target and a Total fee value.
Payout Banks Configuration
Payout Bank Details


In this step you can create Payout Bank(s) for your Service Provider. Payout Banks are banks that will be used to make payouts for all System Entities. Service Provider is the System Entity that manages all the pay-ins and pay-outs.
Payout Banks for Platform Accounts and Sub-Accounts are determined automatically based on the Service Provider settings and the currency type configured for each Sub-Account.
Configuring a Payout Bank
- Click Add to add a new Payout Bank

- Click Edit to edit a Payout Bank Name

- Fill in the Payout Bank form and click Submit to complete the Service Provider onboarding process

- Click OK to confirm new Service Provider onboarding
Add/Edit Payout Bank Form Details
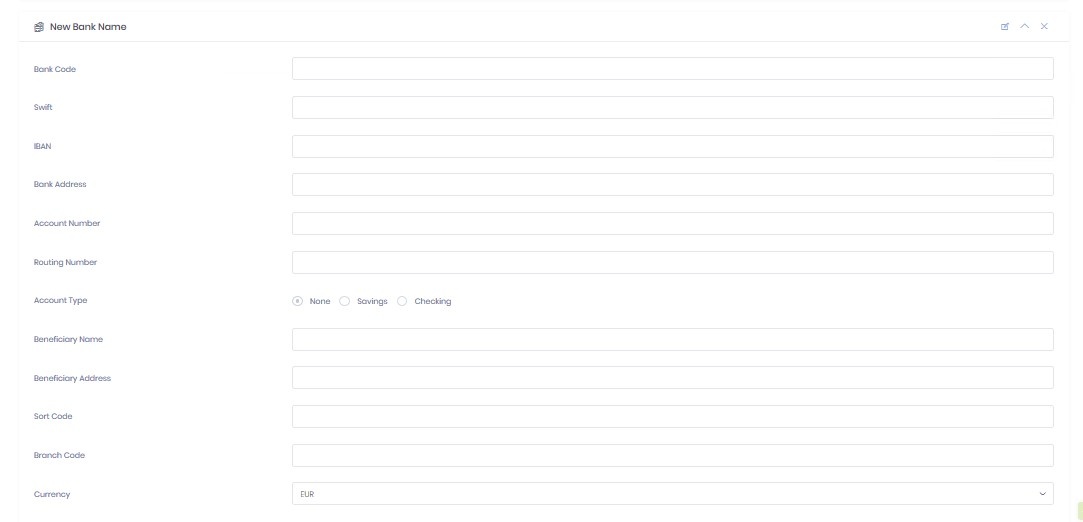
| Name | Description |
| Bank id | Created by the System automatically after you create a Payout Bank |
| Bank Code | A Bank Code is a unique identification code for a particular bank |
| SWIFT | SWIFT is an 8- or 11-digit code that identifies your country, city, bank, and (11-digit only) branch |
| IBAN | IBAN (International Bank Account Number) is an international bank account number used to identify bank accounts. The number starts with a two-digit country code, then two numbers, followed by several more alphanumeric characters. |
| Bank Address | Enter the official address of your payout bank |
| Account Number | Enter a full bank account number |
| Routing Number | A nine-digit number used to identify a financial institution in a transaction |
| Account Type | Select Checking or Savings account type |
| Beneficiary Name | The name of a person or a company receiving the funds |
| Beneficiary Address | The address of a person or a company receiving the funds |
| Sort Code | A six-digit number that identifies both the bank and the branch where the bank account is held. |
| Branch Code | A six-digit number. Identifies both the bank and the branch where the account is held |
| Currency | Select a currency type from the drop-down list |
Service Provider Billing Configuration

Fees created in the Fees and Residuals step with Fee Source=Service Provider appear in the Billing step. In this Billing step the specific values for these fees are configured. Service Provider Fees follow the same logic as Sub-Account Fees with a few exceptions: (See Sub-Account/Billing Wizard section for details about configuring fees and their parameter values)
- Fee Target = Operator or Agent
- Fees are always Stand-Alone Fees; Group Fees are not available
- Buyrate cannot be configured for Service Provider Fees
- Priority levels are not available for Service Provider Fees
- Option to choose ‘Include Own Transactions’:
- If Include Own Transactions is marked, the Service Provider’s own transactions and it’s subordinate transactions will trigger the fees
- If Include Own Transactions is not marked, only transactions processed by the Service Provider’s subordinates will trigger the fees.
Disable/Re-enable a Service Provider
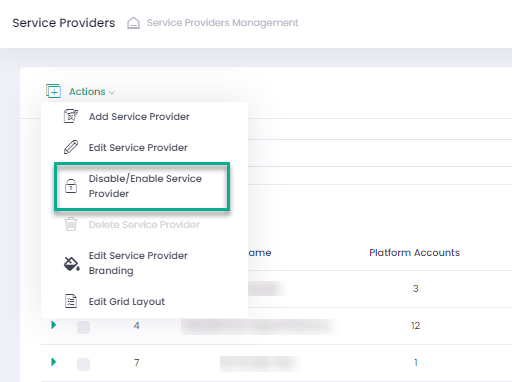
- Select at least one Service Provider in the list of Service Providers

- Click Actions and select Disable/Enable Service Provider
- You can also Disable/Enable Service Provider by clicking Actions in the last column of the table and selecting the appropriate option

- Select Yes, disable it! to disable or Yes, enable it! to enable a Service Provider in the pop-up dialog window
- The Service Provider Status changes to Disabled OR Active accordingly
Delete a Service Provider
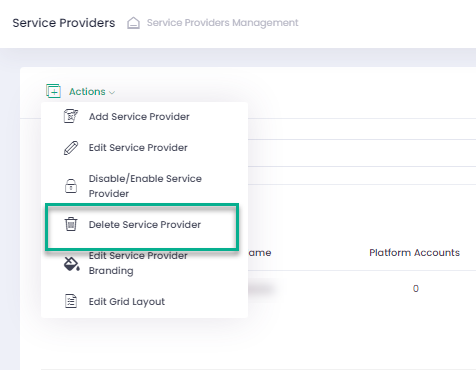
- Select at least one Service Provider
- Click Actions and select Delete Service Provider
- Click Yes, delete it! in the pop-up dialog window to delete a Service Provider
Payout Configuration Details Explained
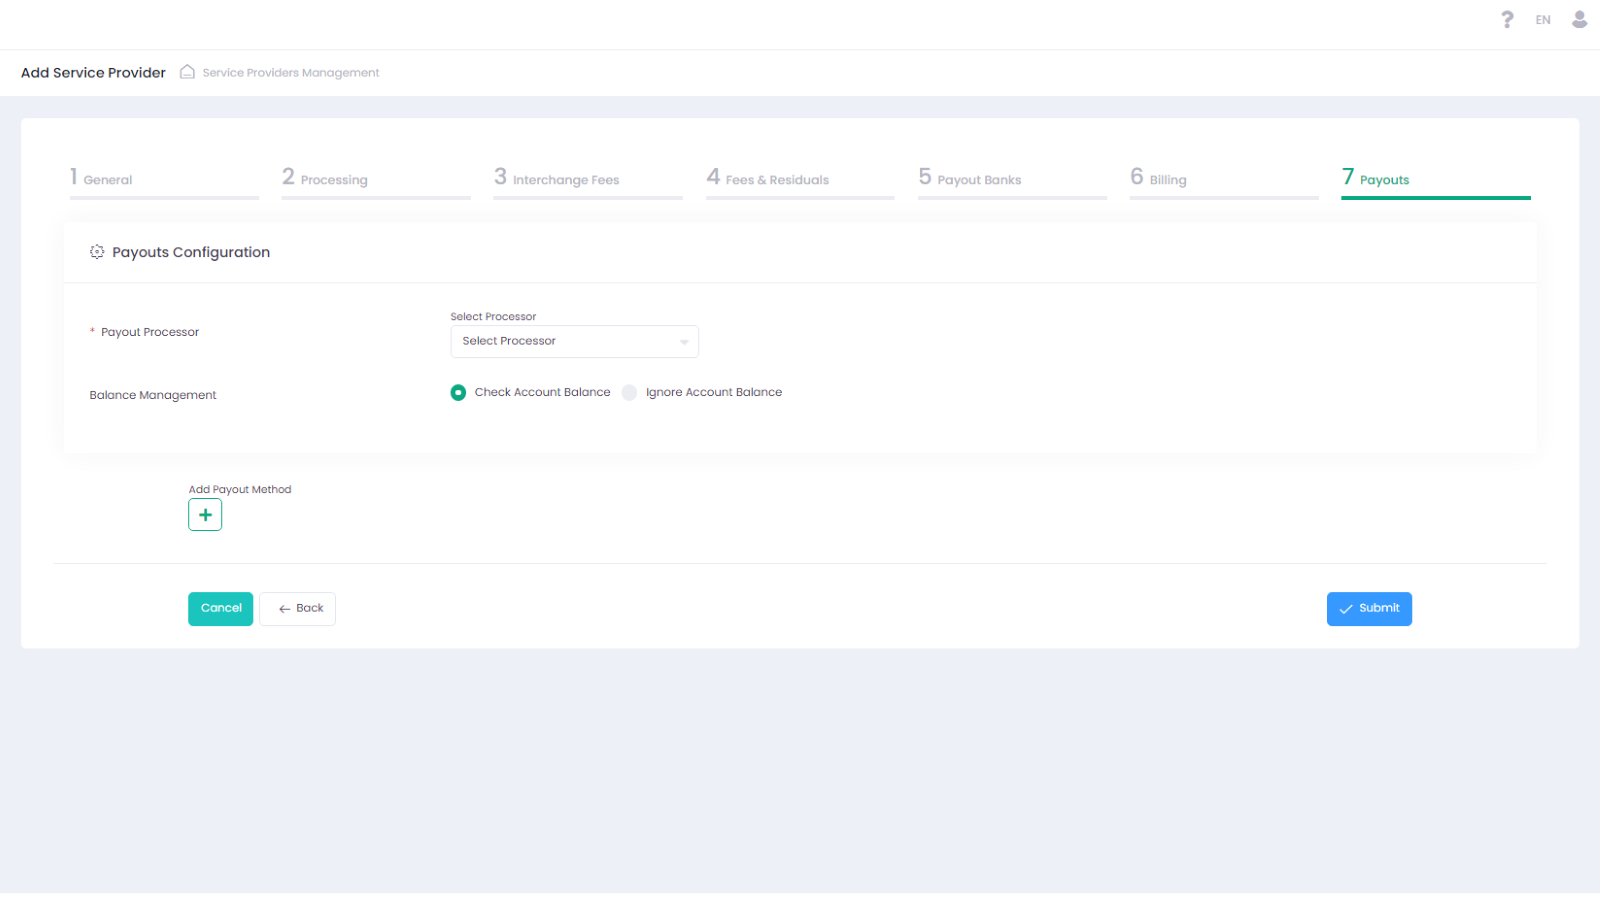
In this section you can choose to use manual or automated payout options, payout processor and specify external payouts processor parameters.
Payouts Configuration Details
| Parameter | Descriotion |
| Payout Processor | Select a Payout processor from the drop-down list or select None to enable manual payouts. Available options are based on the selected Service Provider. External payouts processor is disabled if manual payout (None) option is selected. Manual payouts are manually approved in the Back-Office Payouts report. |
| Processor Parameters | Parameters are pre-populated individually for each Payout processor |
| Balance Management | Balance Management allows configuring payout actions based on the balance value |
| Check Account Balance | Select to enable account balance check prior the payout. In case enabled, negative payouts are disabled. |
| Ignore Account Balance | Select to ignore account balance value for processing payouts. Required to enable negative payouts. |
| Perform Negative Payout (Withdrawal) | if Account Balance is Negative In case selected together with Ignore Account Balance and the returned account balance calculated amount is negative – negative payout transaction is processed |
Configuring Payouts For A Service Provider
In this section you can create and configure individual payout instructions for your Service Provider. You can create payouts, following your business requirements. Available Actions
- Add Payout: use to add an additional payout

- Edit Payout Method Name: use to edit an existing payout name

- Hide/Show: use to hide/show a payout configuration

- Remove: use to delete a payout configuration

Payout Bank details
It is possible to create one payout configuration per currency type.
Payout Schedule
In this section you can create a payout instruction. You can preset payout amount calculation mode and time range to create a rolling reserve according to your risk management policy.
| Name | Description |
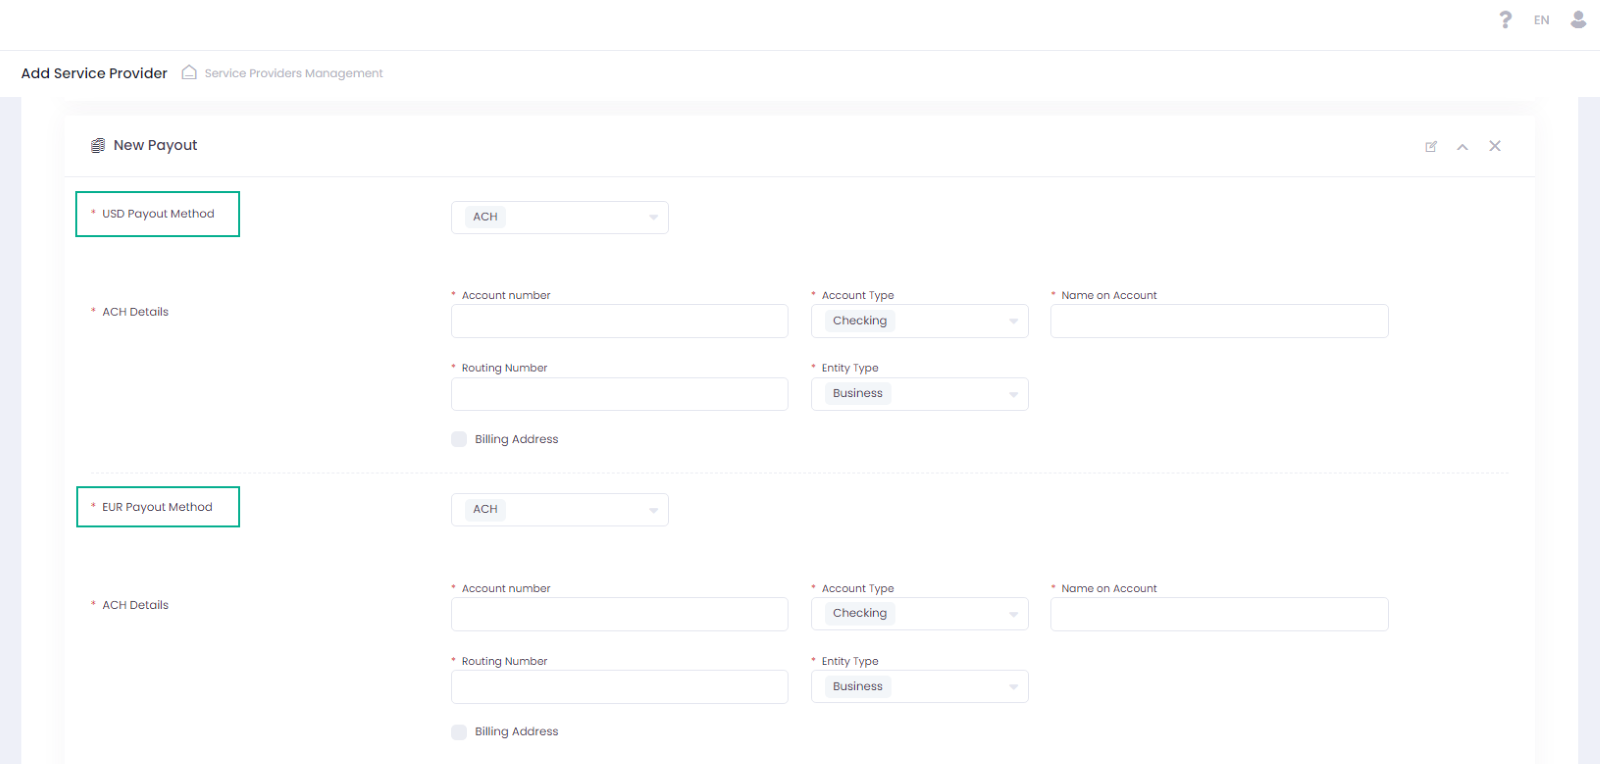
| Payout Method | Select a Payout Method for the payout from the drop-down list. Select None to skip creating a payout instruction for a specific currency. Select ACH to create a payout instruction for a specific currency. |
ACH Details All fields are required. Displayed in case ACH is selected |
|
Payout Scheduler Automated Payout Interval Options |
|
Payout Scheduler Automated Payout Expiration Options |
|
Payout and Reserve Management Payout Amount Calculation Methods |
|
| Two-Step | Select to enable an additional manual payout confirmation via the Back-Office. |
| Approval(semi-automated payout) | Use to add a manual payout approval for automated payouts processed with an external processor or to add an additional manual approval for manual payouts. |
| Payout Time | Time picker to set the payout timing. |
| Scheduler state | Select to enable/disable payout scheduler |